
Wasn’t going to let Christmas stop me! While everyone was enjoying their relaxing Christmas eve (there was hardly any movement in our street), I was outside in the cold sanding and prepping our bonnet for a re-spray. You may not have noticed but it was in a bad way and was only getting worse as rust was starting to set in.
What did I use?
1 x sanding block (can’t remember grit, I think it was a fine grit)
1 x white primer
1 x white spray rattle can (bought from Halfords, look online for your correct colour)
1 x clear coat spray
What did I do?
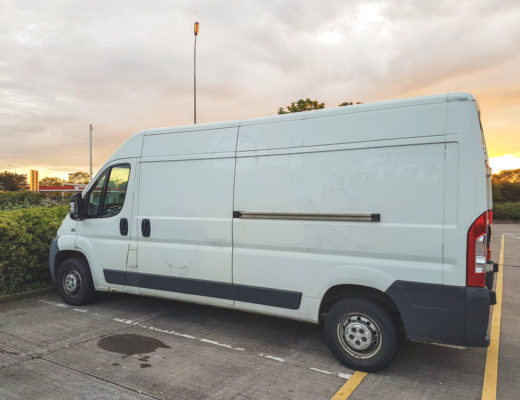
Before:

After:

I didn’t want to pay just yet for a professional repair, but didn’t want to let it get any worse, as it was bugging me every time I saw it and rust! Don’t get me started on rust! Every time I see rust I have flash backs to our previous van which failed its MOT due to aggressive rotting (rust).
Check out the finished result, I am very pleased with it and its 2 months later and its not flaking, peeling or showing any signs of coming off (incorrect prep / bad spraying).


Cleaning / Prep
I began by clearing the bonnet and sounding area, as I needed to get rid of anything which will affect the paint. I then also used paper towels to dry the area and left it a couple hours to make sure it was dry.
Once that was done I covered the areas I didn’t want to spray! Make sure you cover everything, or you are going to be very unhappy.

Sanding
Next, I sanded down the whole bonnet. I wasn’t going for a complete sanding just to remove any of the existing clear coat, oils and protective layer, while also sanding out any rust and smoothing out the paintwork. Luckily all of the rust was surface rust and a simple bit of sanding removed all the spots.

Primer
Time to apply a couple coats of white primer. I did 3 coats of white primer with a 15-minute gap between each coat, then a 1-hour gap on the final coat before I started applying the main colour spray. Between each primer layer I also did a light sanding so that the primer adheres better.

Colour
Time to apply the colour spray. It is very important to try and keep it even and spray smoothly and thinly to stop the paint running – a quick left to right motion on a continuous spray side to side is what you want (I am not an expert but watching some YouTube videos will give you the basics).
I waited 1 hour between each coat with a fine sanding between each coat. The can did say to wait 24 hours between each layer however I am impatient. I would advise you follow the can instructions for best results.
Unfortunately, I ran out of spray paint and with it being late on Christmas eve I was unable to purchase more for a couple days, but I decided it was covered enough and continued onto the Clear Coat stage. It could have done with a couple more layers but from a distance it now looks perfectly fine.

Clear Coat
We are almost finished now. I waited a good couple hours after the final colour spray, then did another light sanding and following the clear coats instructions, applied a layer of clear coat in the same manner as the previous coats.
Clear coat adds the shine and a protective layer. I went with 2 layers as I was happy with the finish.

Happy van building! And let us know how you get on in the comments!
No Comments