
Demi the Ducato
We’ve almost had the new van an entire year now, so I thought it was about time that we shared a little progress update (since we’re so bad at posting on here). We’re so pleased with how much we’ve managed to get done, especially in the last month or so, though our completion deadline is the end of May since we’ve got our ferry booked for our two week roadtrip through Europe where we plan to do a bit of wild camping. If it’s not 100% complete by then, it won’t be the end of the world, but we do need a useable kitchen and toilet for sure haha!

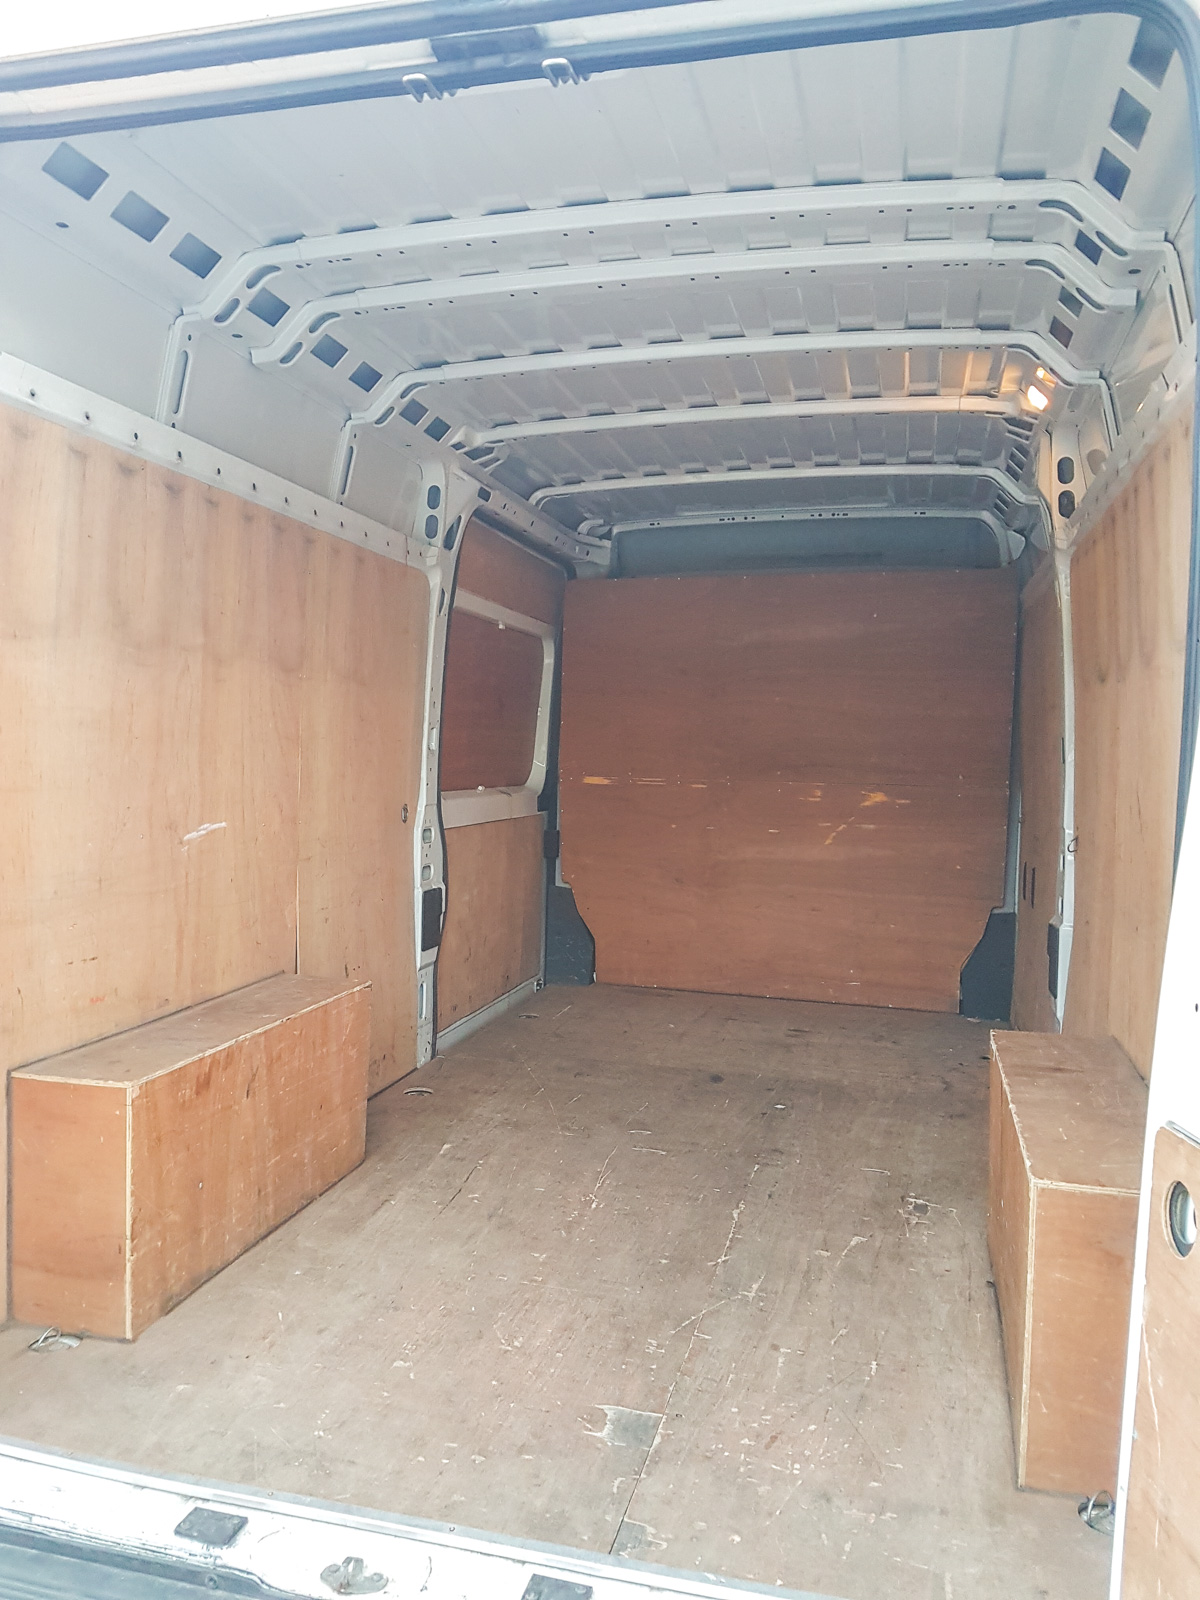
The Beginnings of a Campervan
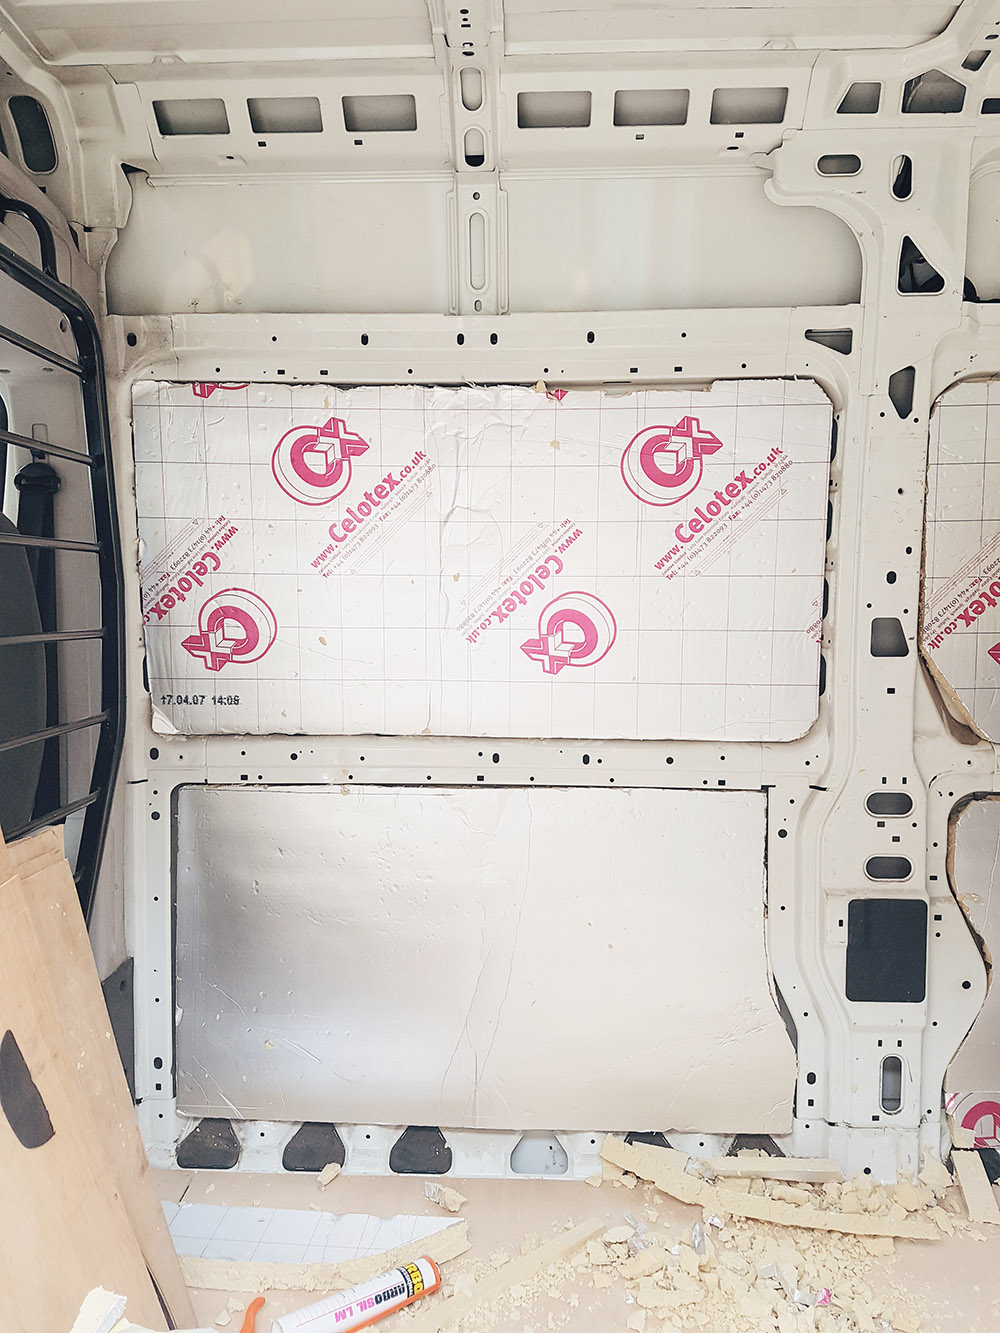
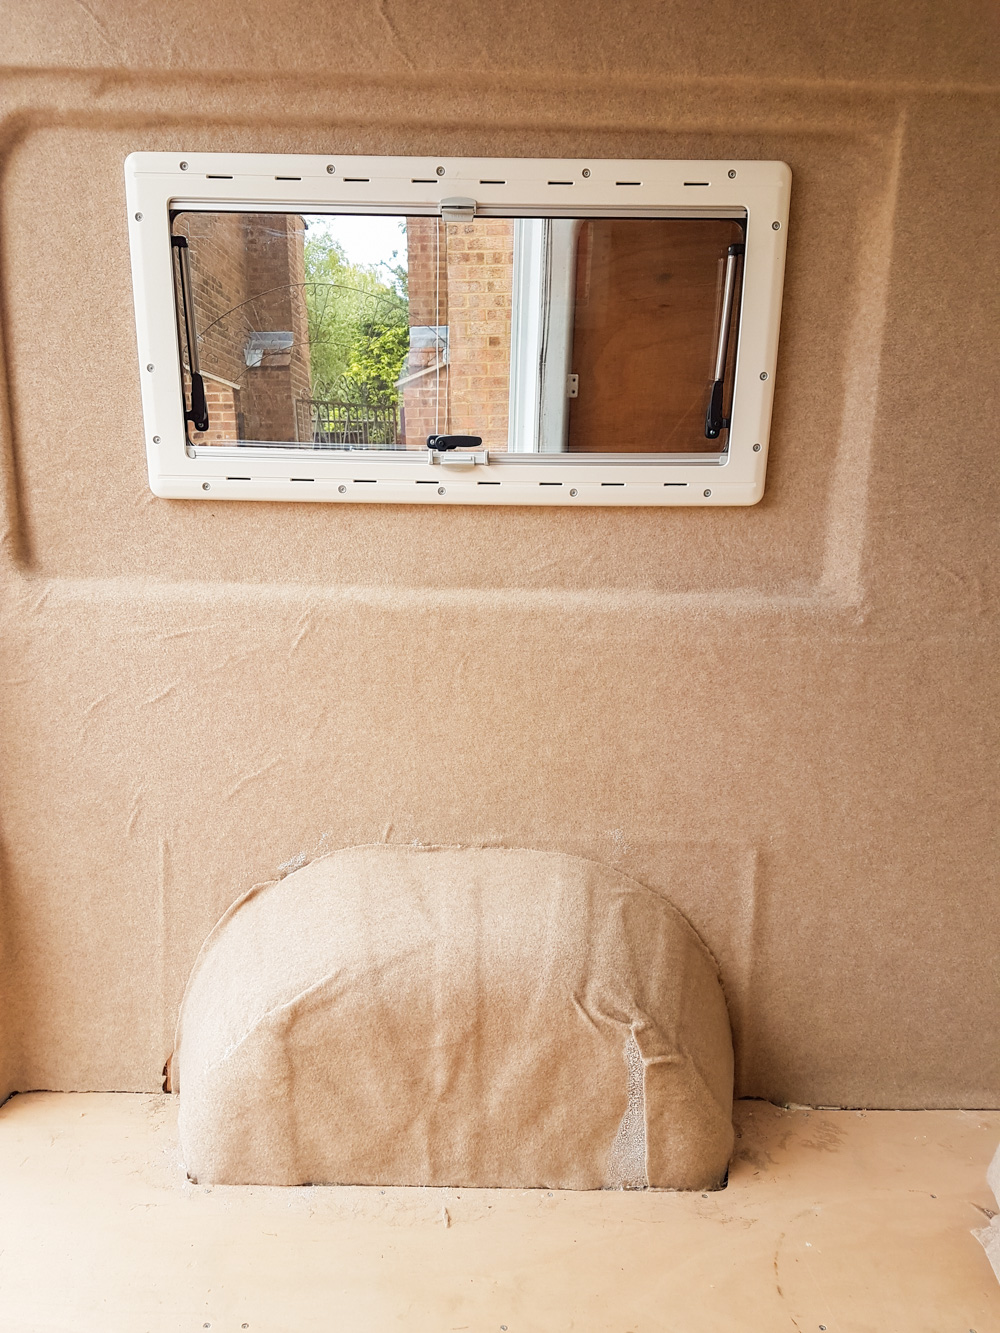
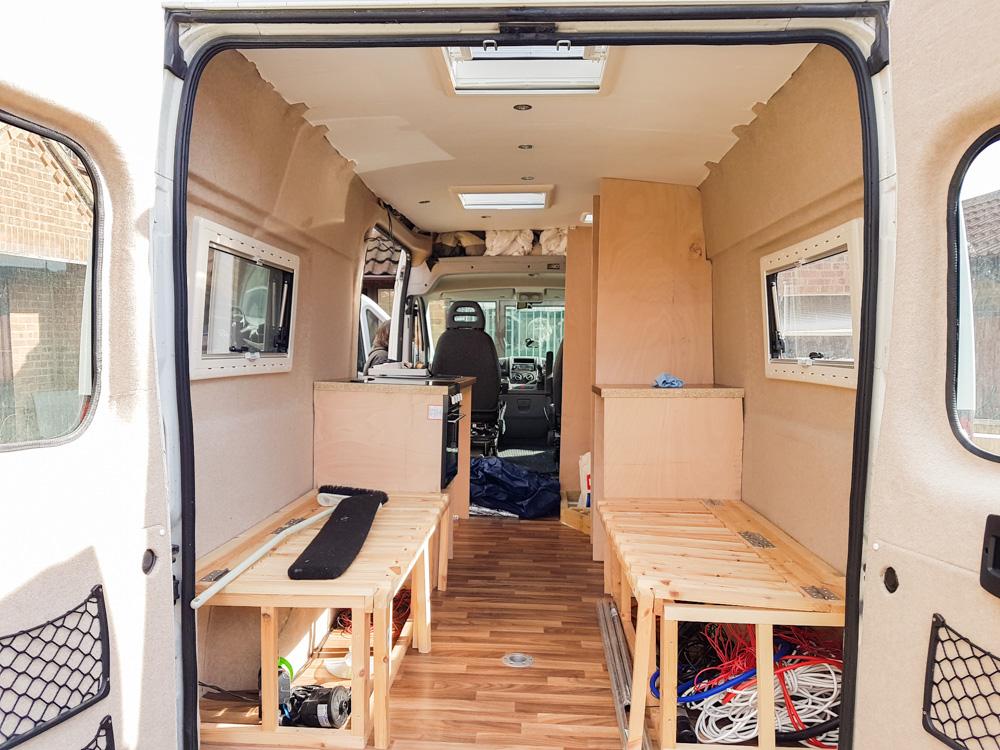
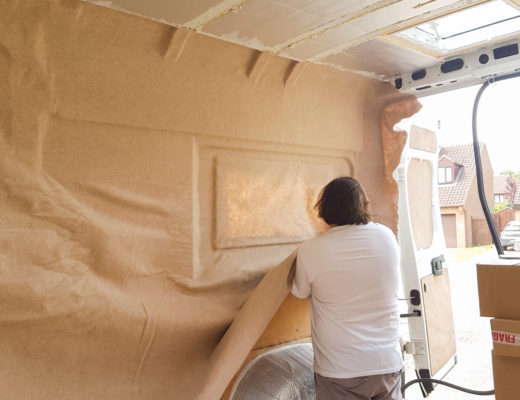
So as you can see, we pulled out the bulkhead, lifted all the flooring and took all of the panelling off of the walls. Then we insulated the entire thing from top to bottom, re-panneled it all and then fitted the side, rear and roof windows and it’s so bright in there now! We still have one more side window to fit onto the sliding door, but there’s no rush with that one. We’ll see how the van looks when it’s almost complete and then decide if we even need the window.
We then carpeted all of the walls and doors (except the sliding door) to make it feel cosy, and Shane swapped out the two passenger seat for a lovely new swivel seat instead!
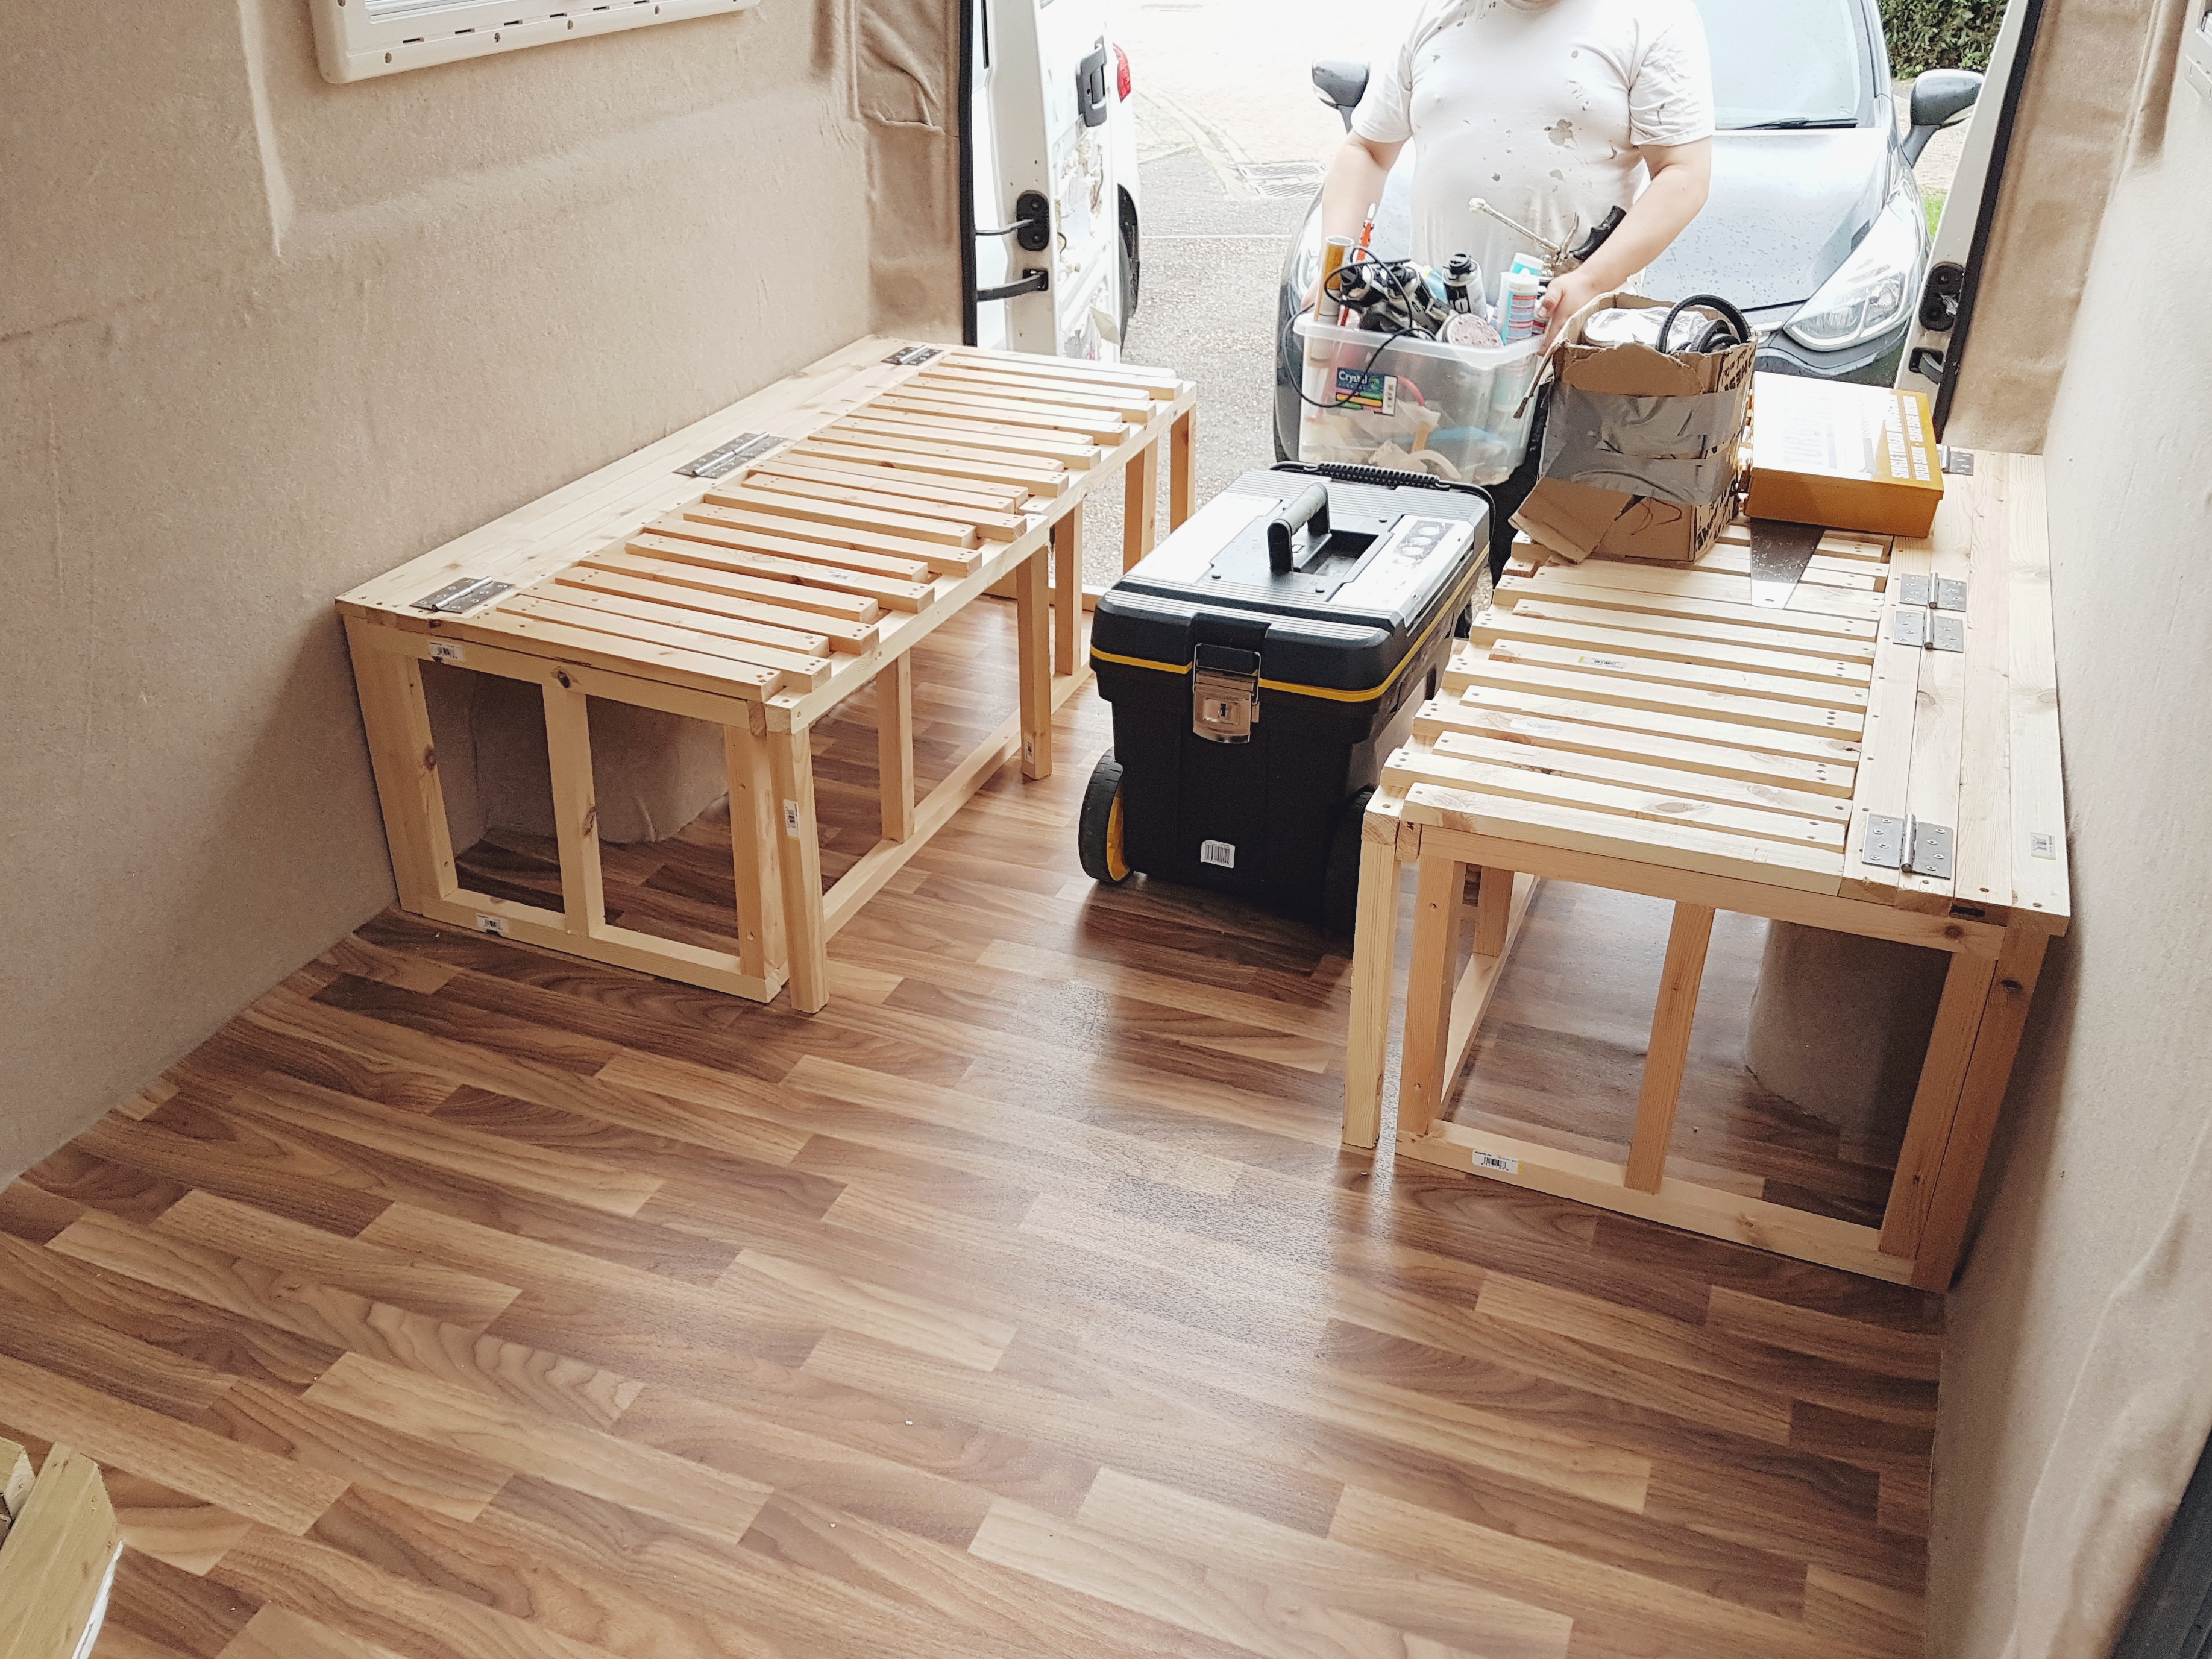

Floor and Ceiling
The next step was to lay the vinyl flooring which instantly made it feel so much more like a home, rather than a van with a few windows and a bedframe! The flooring was getting ruined with all the rain and mud that was being dragged into the van and seeping into the plywood, so we fit the flooring and secured the bedframe to the floor. We also fit the table mount for our removeable table.
After the flooring, we finished off the ceiling. We insulated it, cut out beams and then secured the plywood to the roof. We then lined it with white boat fabric to give it a nice fresh look rather than carpeting or panelling it. While the ceiling was being fitted, Shane also ran all the electrics through to fit the lights.
Exterior
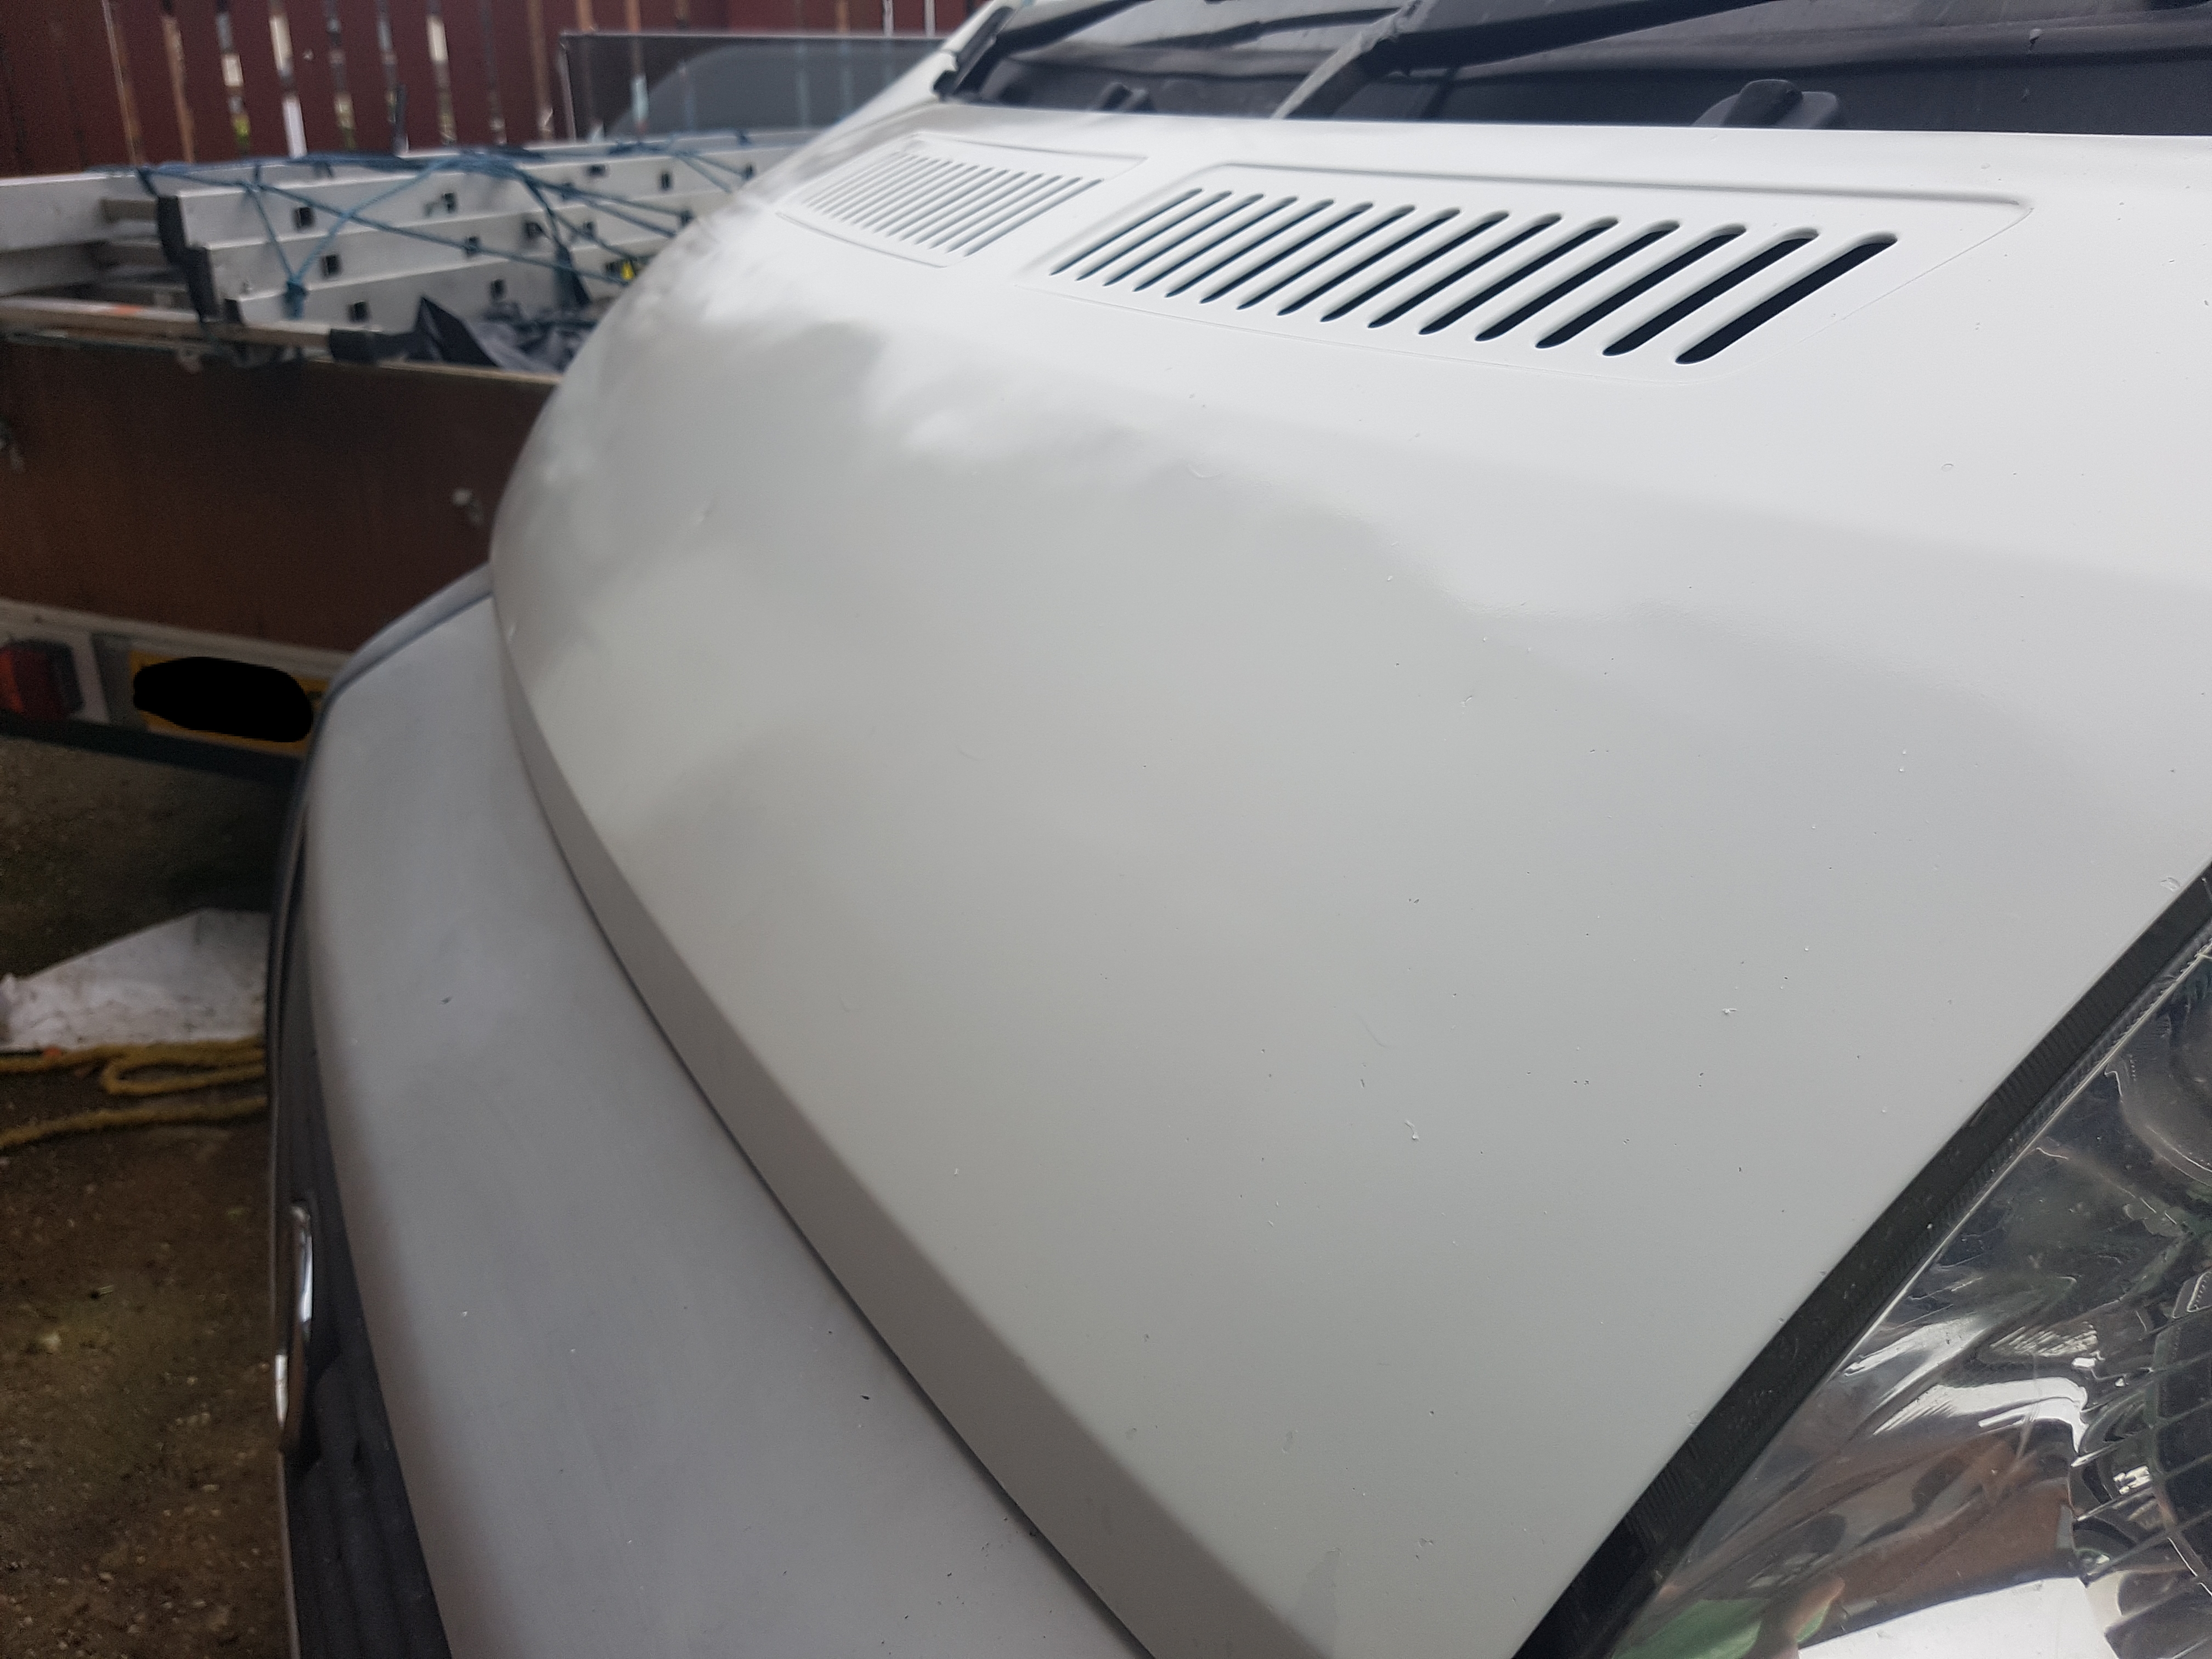
Over Christmas, Shane fixed up the bonnet which was starting to look a bit of a mess. Apparently, the design of the van is pretty rubbish in the front and the paint chips away on the bonnet. Shane sanded it all down and re-sprayed it and it looks as good as new now!
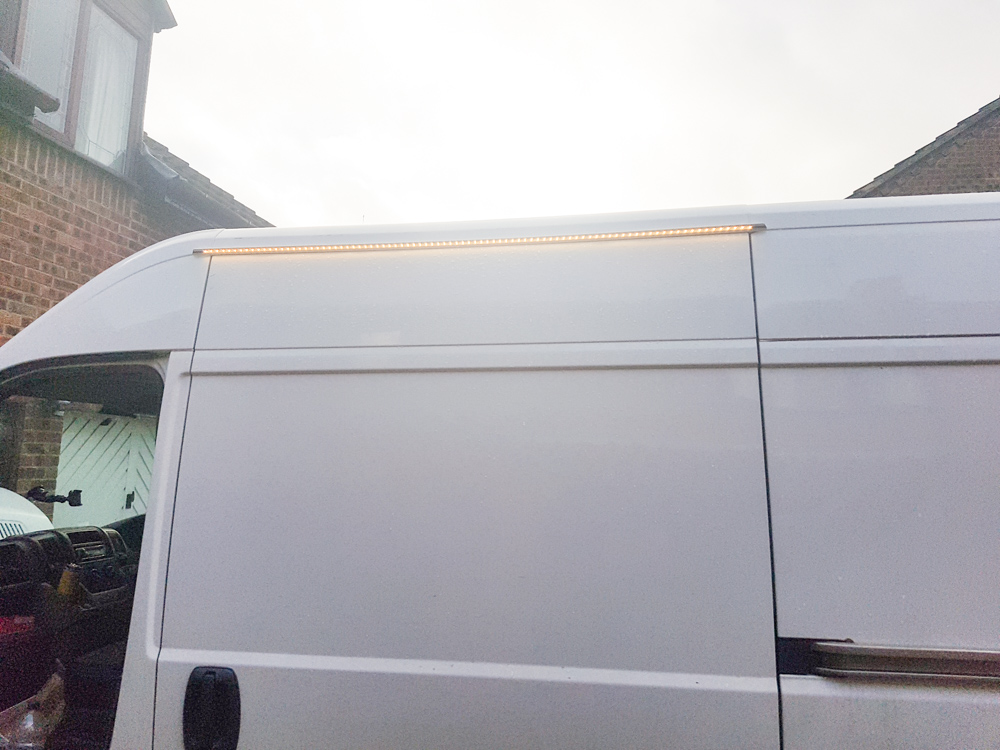
While we were away in Wales, we had a little problem with the door seal letting in water in heavy rain. Shane found a gutter and awning light which he also fitted one afternoon which will be so handy in the summer months for sitting outside in the evenings.
Random Progress
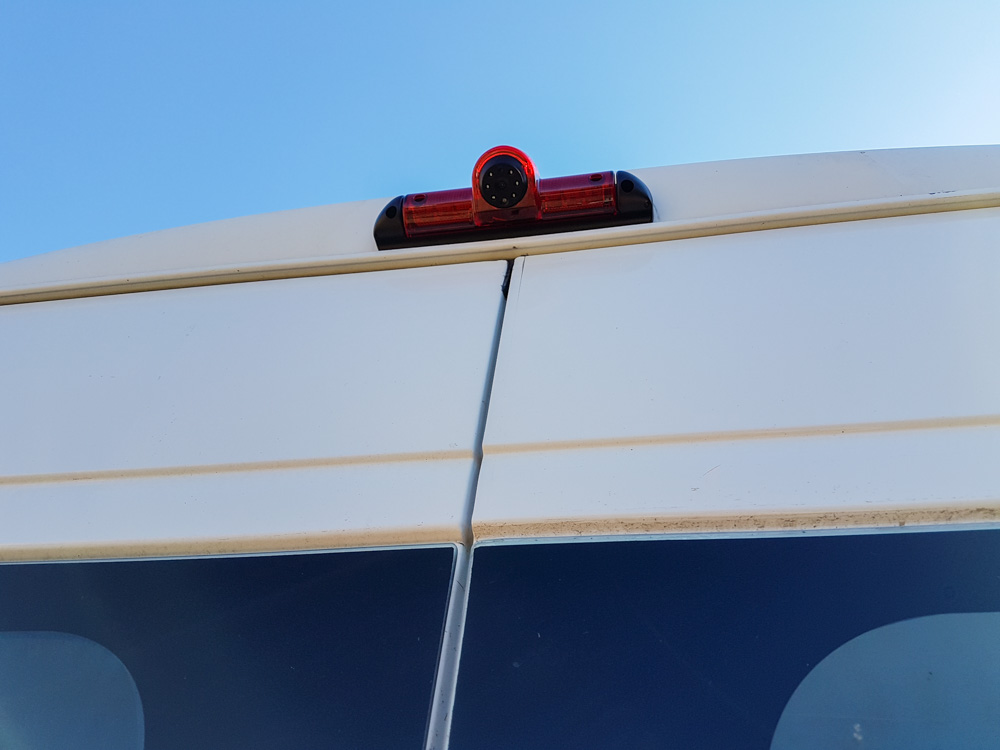
Over the past couple months we’ve really been working on the van to get it finished. Shane decided to add a reverse camera to the brake light which will be so helpful while trying to park the van in Europe.
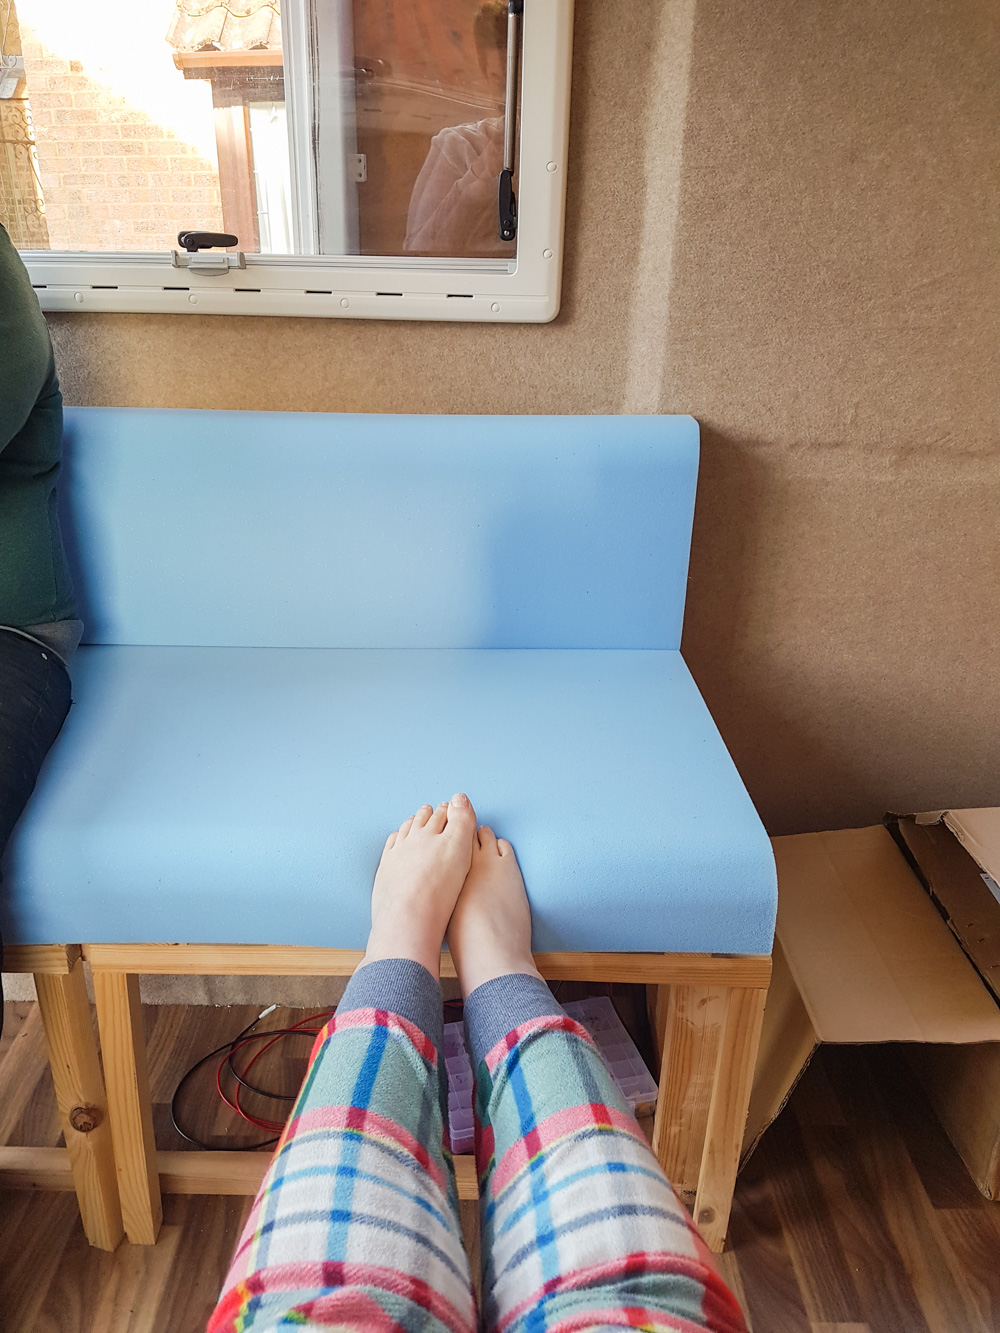
We also finally got round to ordering the foam for the sofa and bed area, rather than having to sleep on our lovely deflating airbed. We got quotes to upholster them, but they were mega expensive, so Shane’s mum is helping us out with that. It’s so much warmer to sleep on too!
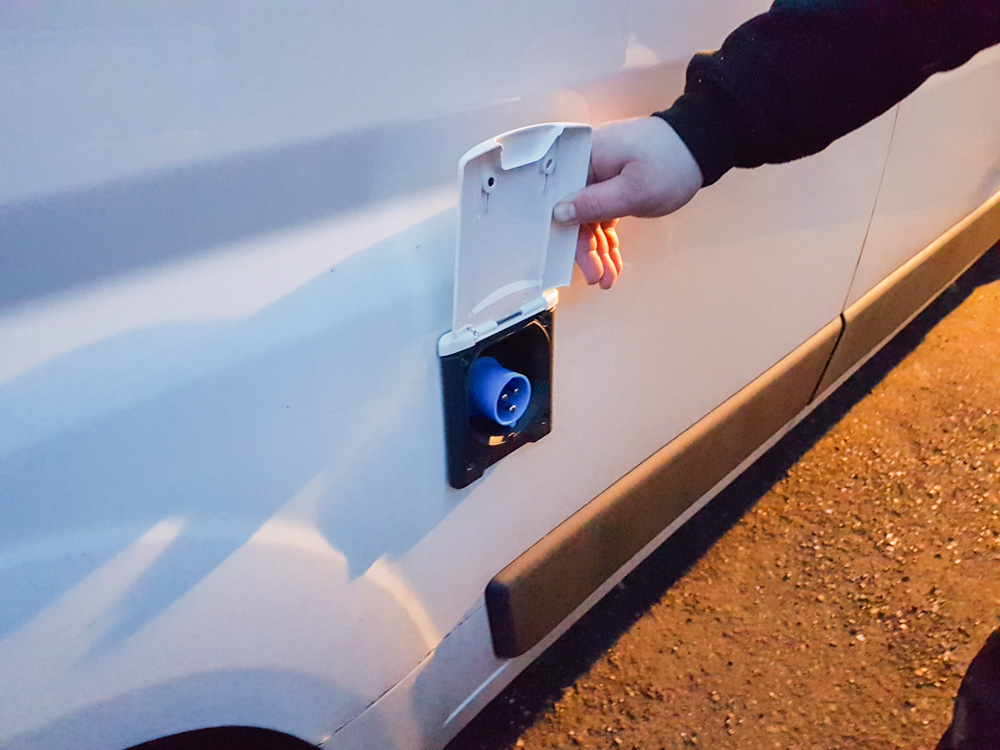
And Shane fitted the external hookup and wired in the leisure battery and solar panels so that we have 12v power. The external hookup isn’t completed yet, so that doesn’t work yet, but it won’t be long now!
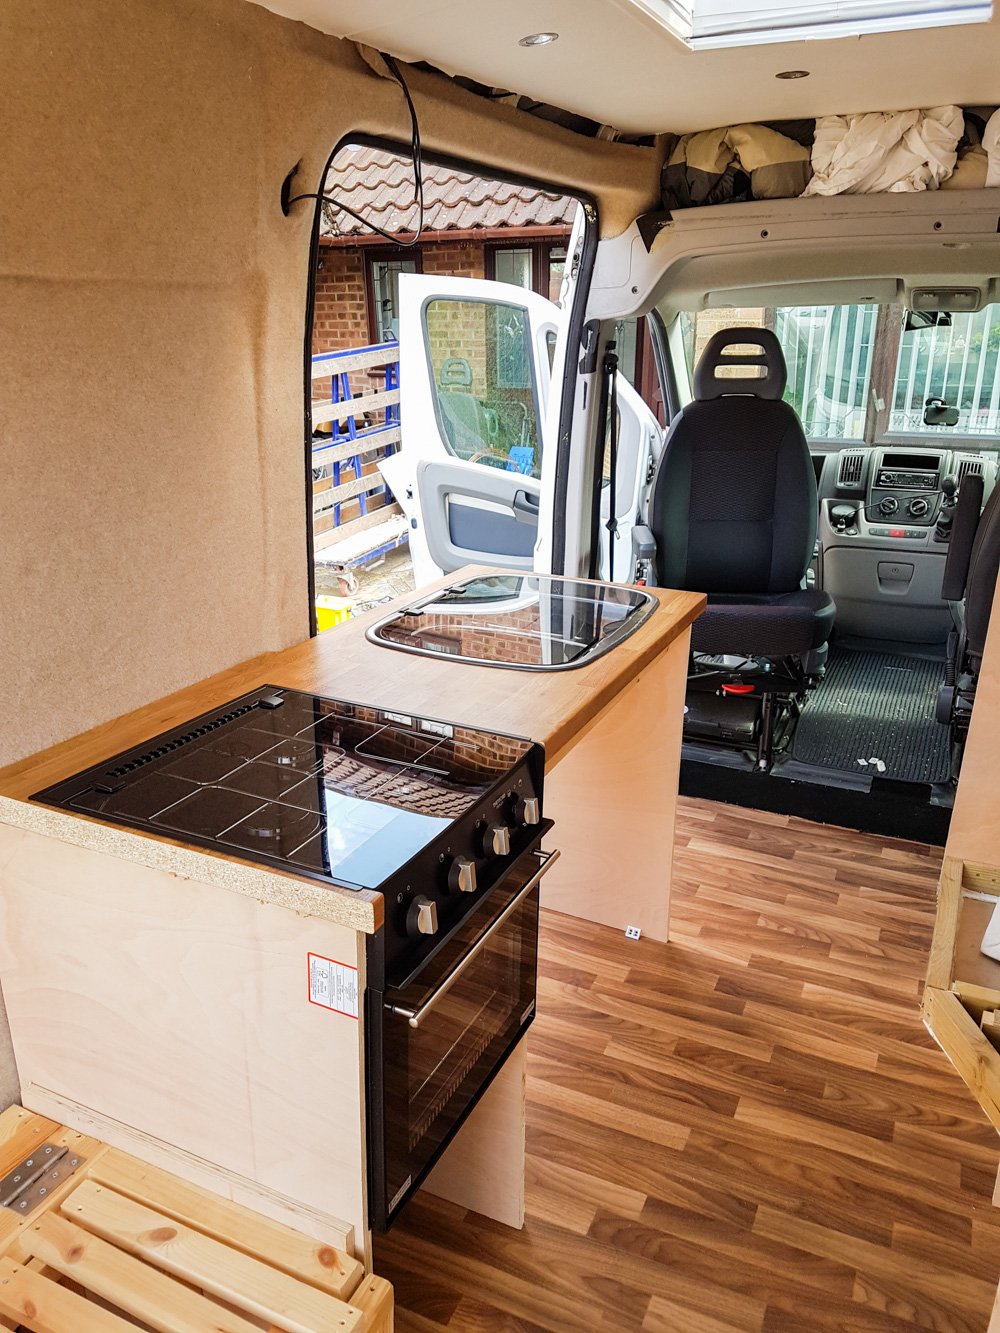
Kitchen
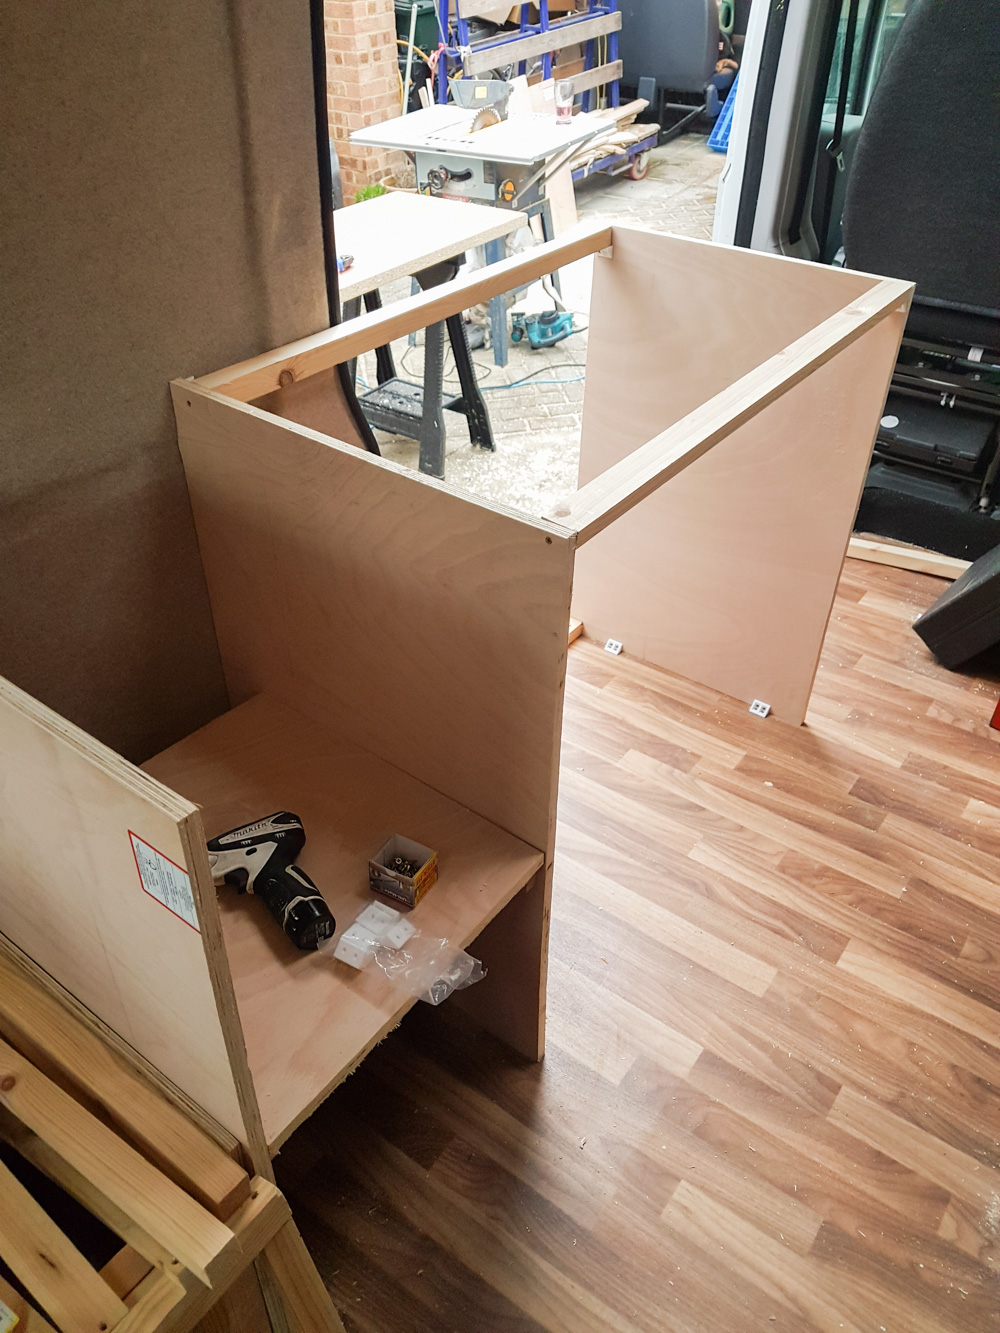
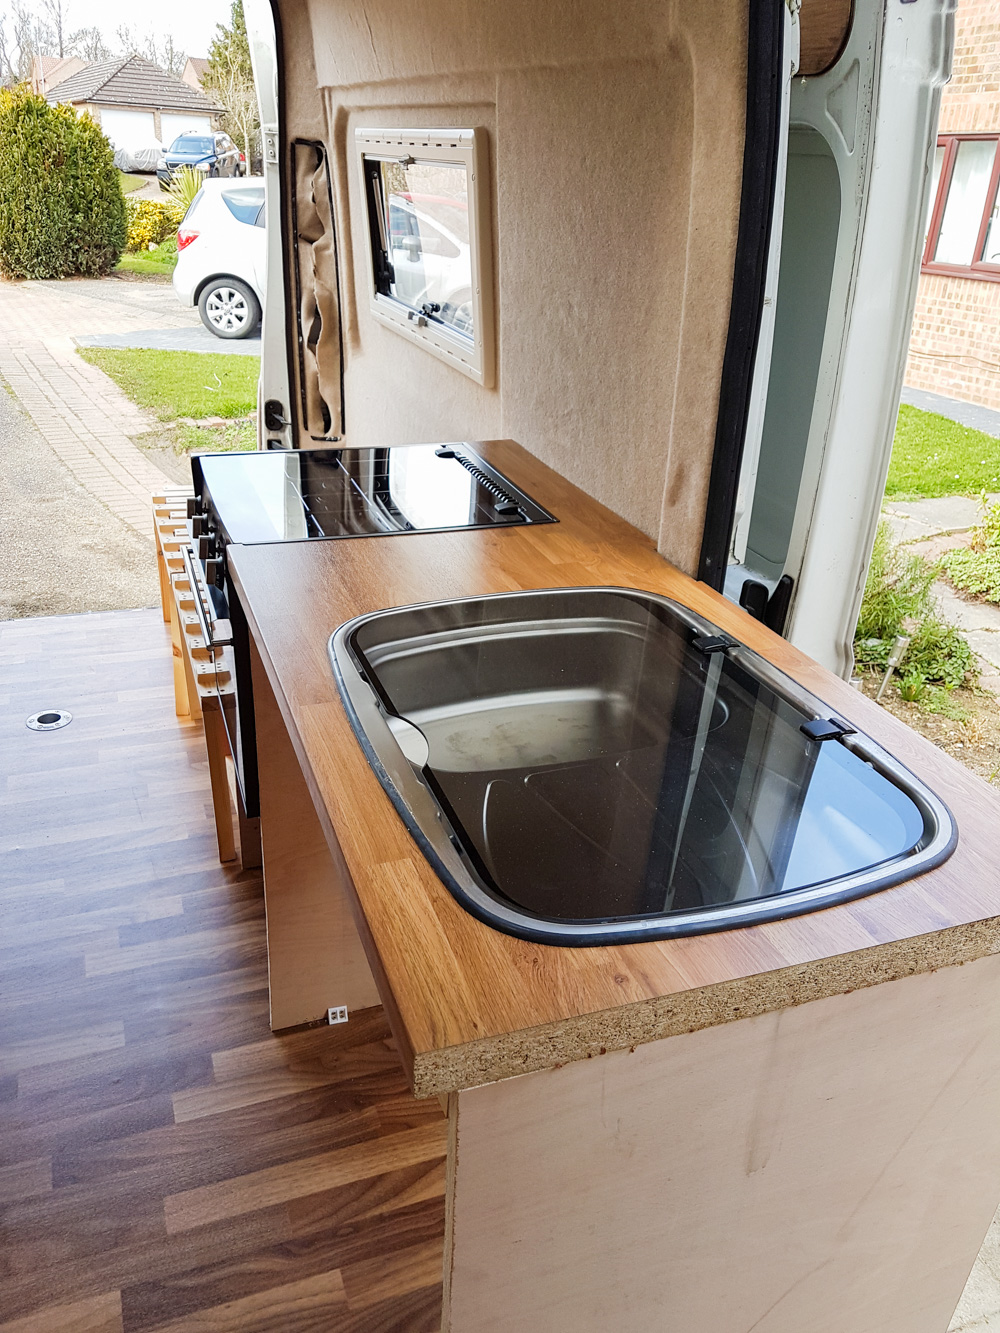
We have a kitchen! It doesn’t work yet though, as nothing is plumbed in / gas fitted, but it’s there! We have a sink & drainer, small fridge and a combi hob/oven/grill. We also need to finish building all of the cabinets to give us loads of drawers and cupboard storage, then cut out and fit the vents for the fridge and wire that all in to the electrics and gas.
What’s next?
Once the kitchen units are completed and the gas, electrics and plumbing are all sorted, we can get on with building the overhead cabinets, finishing the lighting for underneath them and then get started on the bathroom. It’s going to be a wetroom, so we need to figure out how to waterproof it all and fit the toilet. Then just a few more changes and additions and it’ll be completed!
Don’t forget to follow us on instagram for daily updates – you can find us at @adventuresinacamper


5 Comments
Rebecca
April 7, 2018 at 10:04 pmYou guys are so good at this! Amazed at all your progress.
April
April 19, 2018 at 10:21 pmThanks so much Rebecca! 🙂
Laura Toye
May 1, 2018 at 3:00 amWhere did you buy the foam?
April
May 3, 2018 at 9:30 pmWe bought it from GB Foam Direct.
Ben
May 17, 2019 at 9:37 amYour van looks great!
What dimensions is the bed?